
Last Updated on 4 hours ago by Priyanka Handique
Are you fond of creating small DIY projects? Something that is made from scratch and completely raw. Ever thought of creating a pretty DIY Miniature Snow Village? Maybe for a school project or for your home decoration? Sounds interesting, right? Then you have landed on the right platform. Stay tuned as I will share some fascinating tips on how you can create this beautiful Diy Village.
Let’s go step by step:
Firstly, we need to form a solid base for the structure of the village. For that, we have a few options that you can start with:
Building a Solid Base for the Miniature Snow Village
- Use a cardboard or a foam board – You can cut along small rectangular shapes of cardboard to create a firm base for the village. The foundation must be strong so that the village stays intact. You can also use toilet paper for creating silos effect or for round structures.
- Wooden board and Scrapers: The Second option would be to use a solid wooden board. If you want your DIY Miniature snow village to stay for a long period. Using Wooden boards would be the ultimate choice for it. For this, you can use mini wooden houses and small wooden boxes to achieve the desired effects.
- Using Clay materials: You can use clay to create unique pocket-sized buildings and sculptures, such as mountains, tiny people, and animals.
- Budget-friendly items: Use your old bottles and reshape them to create small village people or even decorations like trees. Use cardboard boxes to make mini houses.
Creating False Snow for your Miniature Village
- Shredded Coconut: As coconuts are white in colour, you can definitely use them for creating a snowy effect. Just sprinkle a few shredded coconuts near your village and over the artificial snowy mountains and river banks.
- Baking Soda: The second alternative will be to use baking soda. This is a very versatile ingredient that is found in every household. You can add a few pinches of baking soda near your mountains and villages to create your desired effect. Baking sodas are generally pet and children-friendly.
Note: Adding a lot of baking soda can give more texture to your tiny snow village.
- Using Cotton: Cotton is yet another item found in every single household. Keep some coils of cotton near the DIY Miniature snow village outskirts to get that frosty white effect. It may look artificial, but it is a very affordable alternative.
- Real Snow: A cherry on the top if it’s snowing outside and you can collect real ones. But again, the place would look messy, and it would not even last for a single day. If you want it just for half a day, then you can definitely go for this arrangement.
- Using Shaving cream and hair conditioner: Try mixing a small amount of shaving cream and white hair conditioner. Pour the mixtures in little amount near the village base and mountains.
- Snowy look: Mix equal amounts of white glue and baking soda. Also, add a small amount of white paint to the mixture. This will be adding a icy detail to the trees and rooftops.
- Using Sparkling agents: Add sprinkling glitter on top of every frosty look. This will mimic glistening snow and also give a fresh look to it.
Create a Snowy Landscape
Now that we have created rivers, streams, and mountains around the village. It’s time to add a snowy texture to it.
- Give Natural Texture with shimmery tint: For creating rocky terrains, you can go for white coloured paint. Another combination that can be used is coarse salt with white paint for creating a simmering depth.
- Terrains and Mountains: To create hill tops, you can use blocks and polyester sheets, or even styrofoam sheets can be used for it.
- Lakes and streams: Small details like streams, paths and lakes can be created using the hot wire tool.
- Ground: Buffalo snow blankets are an intelligent idea to cover the ground path. This will not only create a snow-white effect on the path trails, but it will also help with creating a frozen, icy effect. Even quilt and white felt can be used to create layers and fine textures.
Giving Final Touches with Lightning Effect
- Using Fairy lights: You can give a final touch to your DIY Miniature Snow Village. Fairy lights can illuminate your space and give a realistic look. Even tea lights and LEDs can be used to give a warm glow. You can drill small holes and insert wires into the base.
- Give a final snowy look: Spray white paint on the branches of trees, windows and roofs to make it look like a frost bite.
- Accessories: Try adding cute reindeer figures, miniature benches in a park and toy trees to your DIY Miniature Snow Village.
Different ways to create your Snow Village Look
DIY Ideas:
Using Tiny Cardboard Pieces
- Start by cutting cardboard into different shapes to create mini houses.
- Make a mix of 1 and ½ tbsp of baking soda with 1/4th cup of paint.
- Apply the mixture evenly on the houses.
- Let it dry.

- Now it’s time to paint the window panes and doors of the house with white paint.
- Add artificial snowflakes and some bottle brush trees.
- Lastly, add some twinkling lights to your tiny snowy village.
DIY Ideas:
With Wooden Boxes
- Shape your wood pieces into the form of small wood houses.
- Cut the scrap wood to fit in those wooden houses.
- Apply white paint all over the wood.
- After the white paint dries, start by painting the houses with the colour of your choice.
- Take your artificial snow and begin adding it little by little in tiny amounts around your scrap board.
- Add pinecones, green trees and berries around the snow.
- Place fairy lights underneath on the base to illuminate your house.
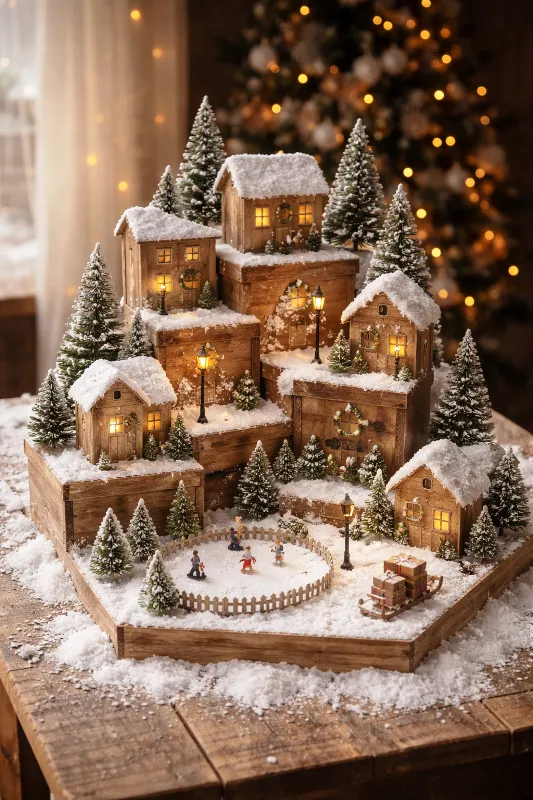
Making use of Ceramic Houses
- Take a wooden tray. This tray can be used as a base for your DIY Miniature Snow Village.
- Place it on a table or anywhere you like.
- Add layers of false snow over the tray.
- Arrange your ceramic houses over it in order.

- Add artificial trees in between the houses to give certain dimensions to your snow village.
- Place pinecones, stack reindeer in the corners and beside the house.
- Scatter tiny ornaments around the village base to bring the glamour to your snow village.
- Decorate it with LED batteries and fairy lights.
- Spray all your decorations with shiny colours.
- Adjust all your pieces back and forth.
Using paper pieces
- Draw small houses on A4-sized paper pieces with a black pen.
- Cut the paper layout according to the shape of the houses.
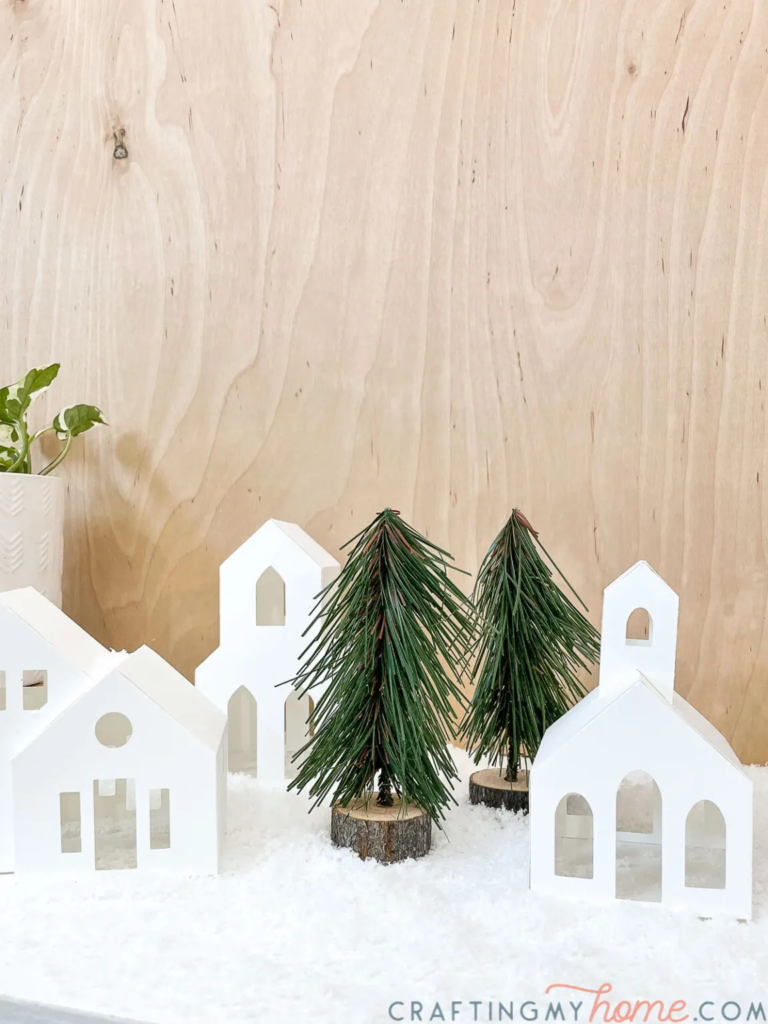
- Leave a trail of long pieces of printable paper beneath the houses.
- Fold the paper in such a way that it will give the houses a 3d dimensional look.
- Furthermore, glue the paper to make it stand on the table.
- Add faux cotton snow all around the small houses.
- Decorate the place with tiny rosemary trees or any artificial pine trees.
- Add fairy lighting to bring in the warmth and cosy touch to the place.
Thermocol Usage
- Start by stacking 3 small blocks of thermocol together with empty spaces in the middle.
- Make it look like a stair placement.
- Cut around 6-9 sheets of paper and crumble them.
- Place it on each step 2-3 as per your choice.
- Then cut plaster cloths.
- Dip it in water.
- Place over the crumpled paper. This will give a rocky terrain effect.
- After the plaster cloth dried, carve a river on top of the mountain.
- Paint the river with blue acrylic colour.
To create an artificial pond,
- take a styrofoam piece and cut it into the desired shape.
- Place another styrofoam sheet underneath the cut piece.
- Glue this piece on top of the large thermocol.
- After it’s dried, paint it into blue or dark blue colour.
- To give a brightening effect, you can also add tiny pebbles/rocks to make it look realistic.
Place a waterfall on your DIY Miniature Snow Village outskirts.
- Take a piece of wax paper.
- Draw straight lines on it.
- Take a toothpick and run it over the lines.
- Let it stay for 24 hours, and afterwards peel off the wax.
- Now hold the wax paper over the pond.
- Use a thin paint brush and gently tap on the peaks to create the splashing water effects.

Create Mountain Effect
- Cut styrofoam sheets into 4 sections.
- Give texture to the sheet using a hot knife.
- Paint the mountains with white or shades of grey to give that icy vibe.
- Place these mountains above the setup, some on the backside and some in the front.
Snowy Village Base
- To create a snowy village base, glue 4-5 styrofoam sheets together.
- Carve blocks on the sides of the base with the help of a hot knife.
Building Stairs:
- Draw stairs on the base of the sheets with a knife.
Managing and Aftercare for your DIY Miniature Snow Village
See if you care for your snow village, it will obviously have a greater shelf life. You can follow the instructions below to increase its longevity:
- When you store the Snow Village Make sure to allow the snow (Baking soda-paint or Baking soda-cornstarch mixture) to dry completely. Otherwise, this will cause mould and dew on it.
- Make sure to clean the surface or the base of the village with a fluffy and clean brush. This will prevent dust from accumulating on the village base.
- Do not use harsh chemicals or any toxic materials that can cause you any kind of health problems.
- If you want to reuse the snow village, try to store it in a clean and dry place.
- Place it in a cardboard or any air-tight container if your village is small in size.
- Do not forget to dust the place clean.
Tips and Tricks to illuminate your sweet little DIY even more:
- Place small figurines and tiny mountains on the backend. While making sure to keep the largest trees and houses at the front. This will trick the eye into seeing depth in the DIY.
- Everyone loves smelling good. So why cant your DIY too, right? Well, use a few drops of cinnamon or pine essential oils on the cotton snow you have placed. This will give a lovely smell to the snowy setup.
- Apply sa mall amount of grey or brown paint on house edges to give the feeling that it has survived several winters.
- Make use of a fine strainer to sprinkle glitter or baking soda, as this will avoid creating a mess in the place.
- If you want to make your creation more interesting to look at. Try using plastic windows from pasta boxes to create window panes for houses.
- Hide battery packs behind snow hills made of cotton. Also, you can use warm fairy lights instead of the cool ones to bring a smoother and warmer effect to the Snowy Village.
- Imitate deep ice cuts by placing a hand-operated mirror or blue tinted resin cover plastic wrapper.
FAQ’s
- Can I add natural elements to my DIY Miniature Snow Village?
Ans: Yes, you can use cinnamon sticks, evergreen clipping and real pinecones to make your snow village look beautiful and realistic.
- Why does my styrofoam start melting as I try to paint it?
Ans: Styrofoams are sensitive to chemicals. You need to use a primer layer or a combination of white glue and water to create a protective layer before using your paints.
- How to prevent false snow from yellowing?
Ans: Avoid direct sunlight. In case you have used a baking soda and hair conditioner mix, try adding a small drop of blue acrylic paint to it. This will neutralise the yellow tones and retain its whitish, snowy colour.
- Can artificial trees be replaced with real ones?
Ans: Yes, you can use real pinecones and rosemary. But it’s going to be a bit tricky. These trees will eventually start withering and turn dry. If you want your DIY to last longer, it is recommended to use bottle brush trees and preserved mosses. If you are thinking of using real twigs, first spray them with matte sealant. This will prevent it from becoming brittle.
- Is there a way to make the Miniature Snowy Village look Windy?
Ans: Yes! The thought itself seems fascinating. To do this, try applying the glue in a wavy pattern instead of layers. Accumulate the snow on a single side of the house. Doing this effect will naturally bring out the stormy pattern you need on your DIY Village.
Conclusion
Creating your DIY Miniature Snow village is more than just a craft; it’s about capturing a piece of winter magic. By following these steps, you’ll transform simple household items into a whimsical wonderland. Whether you choose the recyclable charm of cardboard or the sturdy elegance of wooden boxes, your shopping list is the first step toward a winter masterpiece. By gathering these specific materials, you’re ready to transform raw items into a cosy, glowing wonderland that brings holiday magic to life!
Read More: