
Last Updated on 4 years ago by Priyanka Handique
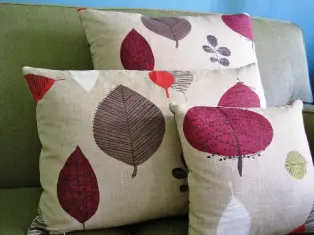
There are various ways in which you can decorate your house. You can choose the perfect designs that can complement the surrounding of your room and its colors. Also one of the ways is to integrate throw pillows in your rooms. Adding to its decorative quality, you can put the throw pillows in whichever room you want, and it will automatically elevate the beauty of the place.
But, we are not talking about buying pillows from the shops or online sites. You can save all that money on your favorite snacks and shoes. Why buy the throw pillows when you can make them yourself, in the most effortless way? “Do-it-Yourself” or “DIY” has even become a trend, where you can reuse any and every product at your home in some new way and make the things you require by yourself.
So, in the following discussion, we have discussed the different ways you can make throw pillows in the easiest steps possible. So, let us get started with our discussion without any further delay.
How to make a throw pillow with trim?
To learn or know how to make throw pillows with trim, we have first to discuss how you can make throw pillows. Without knowing the steps to create a throw pillow, it is not fruitful to discuss how to add trims to the pillow. So, let us first understand and learn how you can make throw pillows.
First, we must know the different essential factors we need to know about making a throw pillow with trims. The following list will state the critical factors you must consider and ensure for making throw pillows.
- Decide the number
To begin the process, you must be sure how many throw pillows you would like to make. It is an absolutely necessary step because depending on the number of throw pillows you want to make, you will have to arrange the fabric required for making them.
- Decide the fabric you want to use
After deciding on the number of throw pillows you would want to make, the next you have to decide on the fabric of the cloth. It can be cotton, silk, or anything else based on the choice you refer to or the choice that will suit your room.
- Determining the size of the pillows
Another factor that will determine how much fabric you would need for making the pillows is the size of the pillows. You need not maintain the same size with all the pillows. But it is best to determine how big or small the pillows will be so that you can easily arrange for the fabric accordingly.
- Determine the shape of the pillows
This factor will affect the amount of fabric to a certain extent. But when you have an idea about what shape of throw pillows you want, it helps you stay organized. The most common shape for throwing pillows is square. But, you might opt for rectangular, circular or heart shoes as well.
- List the supplies you require for making the throw pillows.
The following are the different tools and supplies you would need for making the throw pillows.
- Sewing scissors
- Sewing machine
- Bobbins
- Threads
- Needles
- Sewing clips
- Straight clips
The reason for determining and arranging all the tools and equipment you need to make the throw pillows is to ensure that you stay organized, making the process much faster and effortless.
Now that we have discussed the necessary aspects you need to ensure for making the throw pillows, we will proceed with the steps for making the pillows now. The following are the steps for creating a throw pillow.
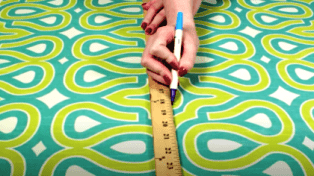
- Step 1: Trace the pillow size on the fabric
Take the help of the old pillowcase or pillow cover to trace the size and border on the fabric you chose for the throw pillow. It helps in being as impeccable and precise as possible.
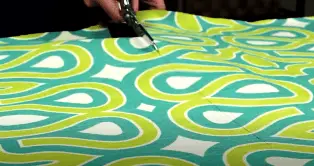
- Step 2: Cut traced out portion of the fabric
Cut the traced-out portion of the fabric with the help of the fabric scissors.
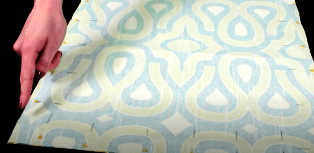
- Step 3: Join the fabric corners
Now match the corners of the fabric and join them together in a place using wall pins. Keep the underside of the fabric outside.
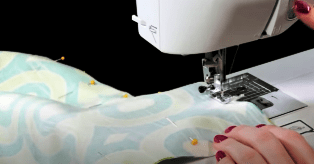
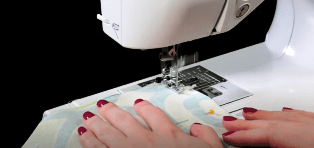
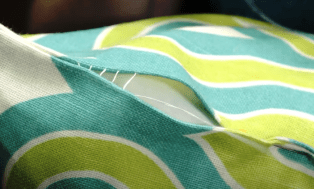
- Step 4: Start sewing from the middle
Start sewing them, but start from the middle. It is a common mistake that one makes while sewing. Ensure to start from the middle, stop after going a bit to ensure you are doing it infallibly and then start again. Also, ensure to leave a space of 3 inches or more because you also need to insert the stuffings inside the cover to make it fluffy.
- Step 5: Strip sewing at the corners
When you reach the edge, strip sewing at the corners, turn to the new direction and continue sewing in the new direction. Repeat this method for every corner of the fabric.
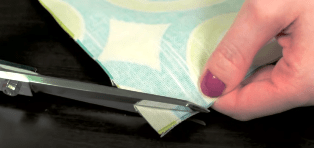
- Step 6: Trim the corners
After completing, trim the corner in a diagonal way. Ensure to keep distance from the threads while clipping. It will help your pillow have pointing corners.
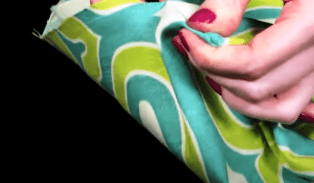
- Step 7: Pull out the corner edges
Take the help of a needle to pull out the corner edges. It will help in achieving a sharp point. And for doing so, flip to the rightward side.
- Step 8: Stitch up the gap after stuffing
Stuff the pillows with the stuffing you want. And after being done with the stuffing part, stitch up the gap you had left. And thus will complete the process of making a throw pillow.
Now that we have completed discussing the steps for making a throw pillow, it is time to add some trims. So, here are the steps that will help you add trims to your throw pillows.
Step 1
Choose the fabric you want to make the trims with
Step 2
Follow the steps mentioned above to make the throw pillows to which you have to add the trims.
Step 3
Press the fabric with which you would be making the trims. And this step must be completed before you start cutting the fabric or placing them according to the patterns.
Step 4
Now cut out the fabric in the shape and size you would want to integrate into your throw pillows.
Step 5
Place the cut-out fabric of the trim along the edges of the throw pillow. If you have hanging trims, such as pom-poms, then place the hanging Putin inside the pillow.
Step 6
Pin the fabric of the trim along with the pillow where you have placed it with the help of pins.
Step 7
It would be best for you not to cut the trim at the corners and opt for rounded corners for the trims of your throw pillows.
Step 8
Now, use the sewing machine to stitch the trim fabric to the throne pillow. You can also use your own hands for stitching the trim fabric to the throw pillow.
Step 9
Ensure to sew each of the opening sides separately. It is because you will have to ensure that the second fabric layer is not close to the opening hole while sewing the trim fabrics in these areas.
Step 10
After ensuring that the second fabric layer is not near the opening, you will have to sew the area of the reim to make the ends of the openings meet. As you complete sewing both the sides, stuff the pillow with the stuffings you want and then, you are good to go!
How to make a throw pillow with a zipper?

You can make varieties of throw pillows, and the next variety that we will be discussing is the throw pillow with a zipper. This, too, you can make it yourself without buying from the stores or online sites. And now, we will be proceeding with the hassle-free and straightforward steps for making throw pillows with zippers.
But, before going into the steps, we must know what supplies and tools we would require in the process. So, ensure to check the following list of essentials before starting to make the throw pillows with zippers.
- The fabric of your choice
- The stiffening you would want to put in the pillow
- A sewing machine
- A zipper
- A zipper foot
- Needles, threads, fabric scissors
Now that we are all set with our equipment, let us jump right into the steps that will tell us how to make throw pillows with zippers.
Step 1: Start with measuring and cutting the fabric.
Take the measurements that you would want your pillow to have. Trace the same measurements in the fabric. Then, cut out the fabric along the traced area. It is always best to cut a few millimeters more than what the measurement was.
It ensures that you have some room to sew better and grip the fabric. But at the same time, it ensures that the pillow you have is nicely stuffed and perfect in shape and compactness.
Step 2: Placement and markings of the zipper
Place the zippers on the fabric where you would want the zipper to be placed. Then mark that area. Remember not to put in the zippers now. It is because you only need to mark the area for the zipper’s placement so that you can leave an opening for the zippers to be in the pillow later.
So, just mark on the fabric and proceed to the next step.
Step 3: Sew the bottom edge of the fabric
Now, take the help of the sewing machine and sew the bottom edges. You must maintain a perfect straight zipper line while sewing. There are several methods to do so. Ensure which method you are comfortable sewing with.
If you are comfortable with sewing with the help of a machine, use the machine. And if you prefer sewing by your hands to ensure better precision and detail, then choose to use your hands instead of the device.
Go slow, and remember, the slower you are, the more precise it will be. And as a result, your throw pillow will turn out impeccable.
Step 4: Place and pin the zipper
Now, place the zipper where you want it to be placed. And then pin it to the fabric. So, what you were thinking about doing in the second step will be done now. So, iron the seam area that you made just now and then open it.
Place the zipper on the seam and then start pinning the zipper to the fabric. Ensure to join the zipper with its face down.
Step 5: Sew the zipper
Now that you have placed and pinned the zipper in place, it is time that you sew the zipper to the fabric. It might seem a difficult task, but ensure that you maintain a high level of precision. Here too, if you choose the sewing technique you are comfortable with.
If it is with the help of a sewing machine, then opt for it. Otherwise, if you believe that your hands will offer better precision, feel free to use your hands to sew the zipper to the fabric.
Step 6: Sew the left out portions of your pillow
Now that you have the zippers in place and all nicely stocked up, you will have to stitch the remaining portions of the pillow. Lay the fabric with the good side facing inwards. Then match up the sides perfectly.
After aching up the sides, stitch the places left to cover and while you do all this, ensure that the zipper of your pillowcase is zipped. And it would be best if you kept it zipped halfway, for you would later need to stuff the stuffing in the pillow and zipping the zipper only halfway will make this process easier.
Step 7: Serge the edges and stuff your pillow
Do not worry about owning a serger. Serging the edges will give you the advantage of washing your pillows wherever you want. And then, you can stuff the pillow with soft stuffing, which will end the process of making throw pillows with zippers.
Final Words
And that ends our discussion of how to make your throw pillows for your rooms and add some trims and zippers with them. Choose the best fabric you want and be very selective in opting for the colors and patterns of the pillow fabric you want. You are never too old to begin a new hobby and making these homemade throw pillows is a perfect way to try out something new.
With that being said, make as many throw pillows as you want and make your room look more beautiful and comfy than ever!
Read More Posts:
- “Make yourself a priority” quotes for independent moms
- List of kitchen essentials for new home owners
- 15 FAQs on burp cloths for a wannabe mommy
- Best Face Mask Holder Buying Guide
- 10 beautiful baby shower decoration ideas at home
- Best succulent costume ideas for Halloween