If you’ve ever watched a clematis do its thing — those long, winding stems reaching out like they’re searching for something to hold onto — you already know this plant was born to climb. What it climbs, though? That part is entirely up to you. And honestly, the trellis you choose can transform a clematis from a pretty plant into an absolute showstopper.
I’ve tried a lot of different support structures over the years, from wobbly DIY jobs to solid cedar obelisks to the humble bamboo tripod I still use in containers on my patio. Each one taught me something. Some were disasters (we’ll get to those). Most were surprisingly easy wins once I understood what clematis actually needs from a support structure — which is less about looks and more about grip.
This post covers the best clematis trellis ideas across different garden styles, budgets, and spaces — plus the practical stuff nobody talks about, like which materials hold up over time and how to match your trellis to your clematis pruning group.
Why Clematis Needs the Right Trellis (It’s About the Petioles)
Before we get into specific ideas, it helps to understand how clematis climbs — because it’s different from most vines, and that difference should influence every trellis decision you make.
Clematis doesn’t use tendrils or sticky aerial roots like ivy or a climbing hydrangea. Instead, it climbs by twisting its leaf petioles — the little stems connecting each leaf to the main vine — around whatever support is available. Think of it like tiny fingers wrapping around a railing. This means the trellis material needs to be thin enough for those petioles to actually grip. A thick wooden post or a wide decorative beam? Clematis will look at it and shrug. A slender wire, a bamboo cane, a chain-link fence — now we’re talking.
The practical takeaway: your trellis should have elements no thicker than about ½ inch in diameter wherever you want the clematis to self-cling. Thicker structural pieces are fine for the frame, but the climbing surface needs to be slender. Keep that rule in mind as we go through these ideas.
Classic Wooden Trellis Panels
The flat wooden trellis panel is the go-to for a reason — it’s versatile, it looks great against a wall or fence, and it comes in just about every size imaginable. For clematis specifically, look for panels with a diamond or square grid pattern where the crossing slats are thin (around ¼ to ½ inch). Those slim intersections give the petioles something to actually wrap around.
Cedar and redwood panels are worth the extra cost if you’re mounting them semi-permanently. They resist rot naturally and tend to hold up for 10–15 years with minimal maintenance. Pressure-treated pine is cheaper but comes with the ongoing question of chemical leaching near edibles — not usually a concern for ornamental clematis, but worth knowing. Avoid cheap lattice panels made from thin, brittle plastic; they look fine at first but tend to warp and crack within a couple of seasons, especially if you’re somewhere with cold winters.
One thing I’ve learned the hard way: mount your trellis panel at least 2–3 inches away from the wall or fence behind it. Clematis needs air circulation to stay healthy, and a panel pressed flat against a solid surface creates a humid, still microclimate that invites powdery mildew. Simple standoff brackets solve this completely and cost almost nothing.
Best For
Garden fences, garage walls, the side of a shed, or anywhere you want a clean, structured look that blends with the architecture. Works especially well with large-flowered hybrid clematis like ‘Nelly Moser’ or ‘The President’ where you want those blooms spread out and visible.
Obelisks and Tuteurs
An obelisk — sometimes called a tuteur — is a freestanding, tower-shaped support that brings genuine structural elegance to a garden bed. When clematis grows up one, the effect is almost architectural: a column of green punctuated with flowers, rising from the border like a living sculpture.
Wooden obelisks (usually cedar, teak, or painted softwood) are the most popular and tend to look most natural in cottage and traditional garden styles. Metal obelisks — powder-coated steel or wrought iron — last longer and suit contemporary or formal garden designs beautifully. Either way, look for ones with vertical slats or crossbars at regular intervals; these give the clematis plenty of anchor points as it climbs.
Height matters more than most people expect. A standard 5-foot obelisk will be completely swamped by a vigorous Clematis montana within two seasons. For most garden hybrids and viticella types, aim for at least 6 feet. For the really vigorous species like montana or tangutica, consider going taller or choosing a different structure altogether — those plants want to run.
Obelisks also work beautifully in large containers, which lets you bring clematis onto patios and terraces where there’s no ground to plant in. Use a container that’s at least 18 inches wide and deep, and make sure the obelisk base is anchored firmly so the whole thing doesn’t topple in a gust of wind once the clematis has leafed out and acts like a sail.
Best For
Mixed perennial borders, rose gardens, container plantings on patios. Group two or three obelisks of different heights for a dramatic focal-point cluster. Pairs brilliantly with Group 2 clematis like ‘Niobe’ or ‘Henryi’ that have two distinct flowering periods.
Wire Trellis Systems
If you want a support that almost disappears and lets the plant be the star, a wire trellis system is hard to beat. This is essentially a grid of horizontal and/or vertical wires tensioned between wall anchors or posts — clean, minimal, and supremely functional.
Stainless steel wire (often called tensioned wire or vine wire) is the gold standard here. It’s strong, rust-resistant, and genuinely unobtrusive against a painted wall. Use eyebolts or vine eyes hammered into masonry or screwed into timber, and run your wires at 12–18 inch vertical intervals. Horizontal wires alone work well; you can add vertical wires to create a grid if you want more coverage.
The key thing with wire systems is tension. A saggy wire does nothing for a clematis — the plant’s weight and the wind will just make it worse over time. Either use turnbuckles to allow adjustment, or start with taut wire from the beginning. Once clematis gets established on a properly tensioned wire system and the stems start to weave through each other, you end up with a self-supporting mat that’s incredibly stable.
Wire systems are also the most discreet option for growing clematis up a house wall — particularly on rendered or brick walls where you don’t want the support structure competing with the facade.
Best For
House walls, garage walls, boundary walls where aesthetics matter. Excellent for vigorous clematis like ‘Bill MacKenzie’ or ‘Jackmanii Superba’ that you want to spread widely across a large surface. Also great for contemporary gardens where a wooden trellis would look out of place.
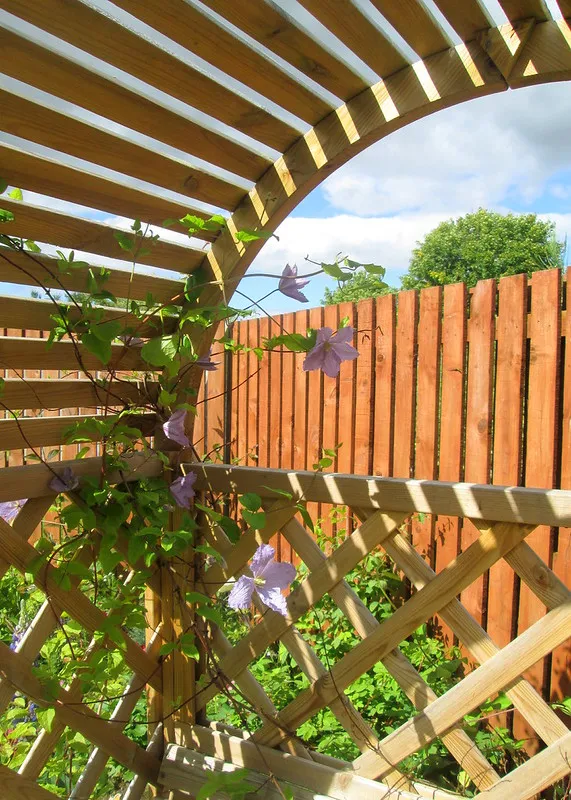
Pergolas and Arbors
Growing clematis over a pergola or arbor is one of those garden ideas that sounds ambitious but is actually straightforward once the structure is in place — because clematis genuinely loves the overhead beams, cross-slats, and uprights that these structures provide. The plant has multiple angles to climb, plenty of surfaces to anchor to, and the overhead growth creates a canopy of flowers that you walk underneath rather than simply look at.
The trick is pairing your clematis to the scale of the structure. A small garden arch doesn’t need a montana that will eventually engulf it and require aggressive annual management. A compact viticella or a Group 3 hybrid like ‘Etoile Violette’ is a much better match — vigorous enough to cover the arch well, but manageable with an annual hard prune. For a large pergola, you have much more latitude; vigorous species and their near-relatives will cover substantial structures and create genuinely spectacular effects.
One thing that makes pergola growing easier: tie the new stems in loosely as they grow, guiding them toward the framework rather than leaving them entirely to their own devices. Clematis will find its way eventually, but a little early direction means better coverage and fewer bare patches lower down.
Best For
Garden entrances, seating areas, walkways. Spectacular when combined with climbing roses — the clematis fills in around and through the rose canes, extending the flowering season. Try late-flowering ‘Ville de Lyon’ alongside a once-blooming rose for a long, colorful display.
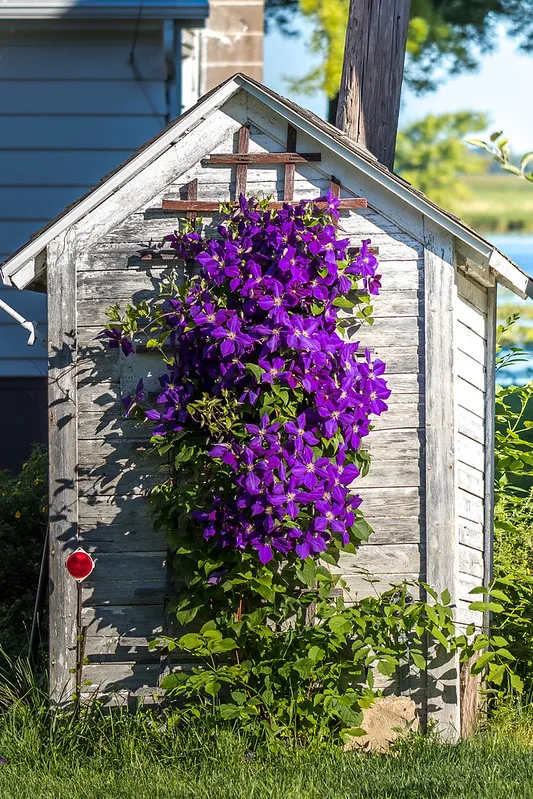
Growing Clematis Through Shrubs and Trees
This one isn’t a trellis in the traditional sense, but it deserves a place on this list because it’s one of the most natural-looking — and genuinely low-maintenance — ways to grow clematis. The idea is simple: use an existing shrub or small tree as the support structure, and let the clematis scramble through it.
The plant’s petioles are perfectly adapted for this kind of growth. In the wild, most clematis species scramble through hedgerows and into scrubby trees, so it’s doing exactly what it evolved to do. The results can be stunning — a clematis flowering from within a spring-blooming shrub effectively gives you two plants in the space of one, flowering at the same time or in sequence depending on your choices.
Some reliable combinations: ‘Perle d’Azur’ (pale blue, Group 3) growing through a Cotinus coggygria (smoke bush) creates a color combination that would look impossible on a flat trellis. Late-flowering viticellas through early-flowering shrub roses extend the season beautifully. Even the vigorous and somewhat rampant Clematis montana becomes acceptable when it’s allowed to run through a large old apple tree where you don’t really need to manage it closely.
Plant the clematis on the shadier, windward side of the host shrub and guide the first few stems toward the host. Once established, it will find its own way up.
Best For
Naturalistic and cottage gardens, mixed borders with established shrubs, anywhere you want a layered, abundant effect without a visible support structure. Group 3 clematis work best here since you can hard-prune them each spring without worrying about damaging the host plant.
DIY Bamboo and Cane Structures
Sometimes the best trellis is the one you build in twenty minutes from bamboo canes you already have in the shed. For containers, raised beds, or a seasonal display while a more permanent support is getting established, a DIY bamboo structure is genuinely hard to beat on a cost-per-effectiveness basis.
The classic approach is a bamboo tripod: three canes pushed into the soil and tied together at the top with twine or a cane clip. Simple, stable, and surprisingly effective. For a wider display, push five or six canes in a fan shape and connect them with horizontal runs of twine or jute every 8–10 inches. The slender bamboo surface is exactly the right diameter for clematis petioles to grip, so the plant takes to it immediately without any persuasion.
You can also build a simple flat grid frame from canes and jute, essentially making your own trellis panel for almost nothing. These aren’t permanent — bamboo degrades over two or three seasons outdoors — but by then your clematis will have developed enough woody structure that it’s partially self-supporting anyway.
Jute twine is the material of choice for tying canes together. It biodegrades, it’s gentle on stems, and it has just enough grip to stay tied without cutting into the plant. Garden wire works too but can be harder on stems if you’re not careful.
Best For
Containers, temporary displays, young plants in their first or second season before a permanent structure is ready. Also great for budget gardeners who want results now rather than after spending on hardware.
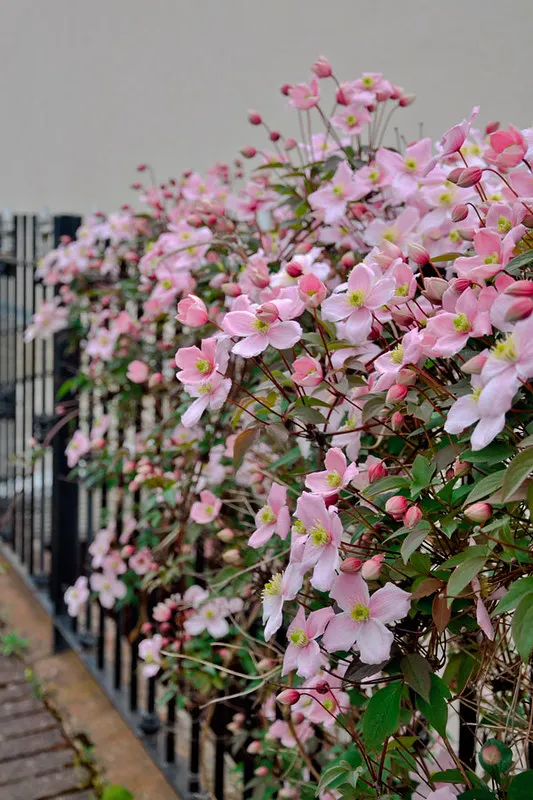
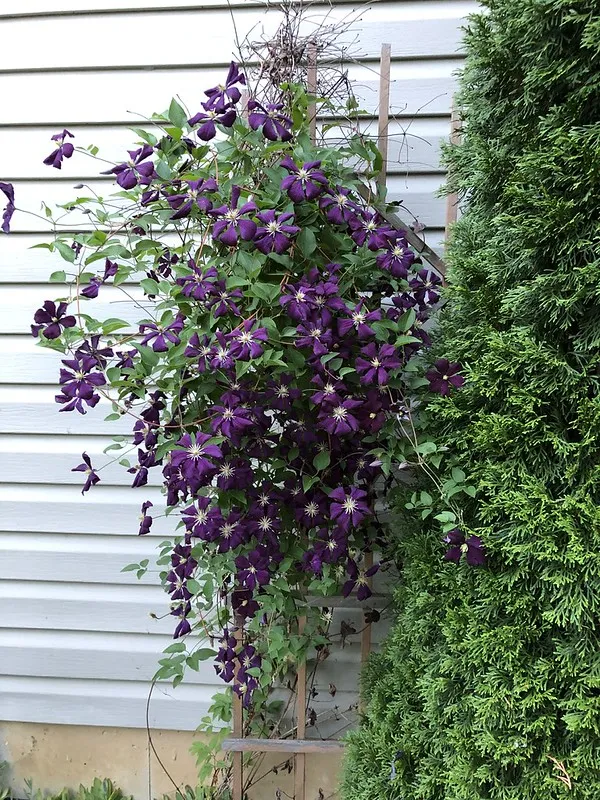
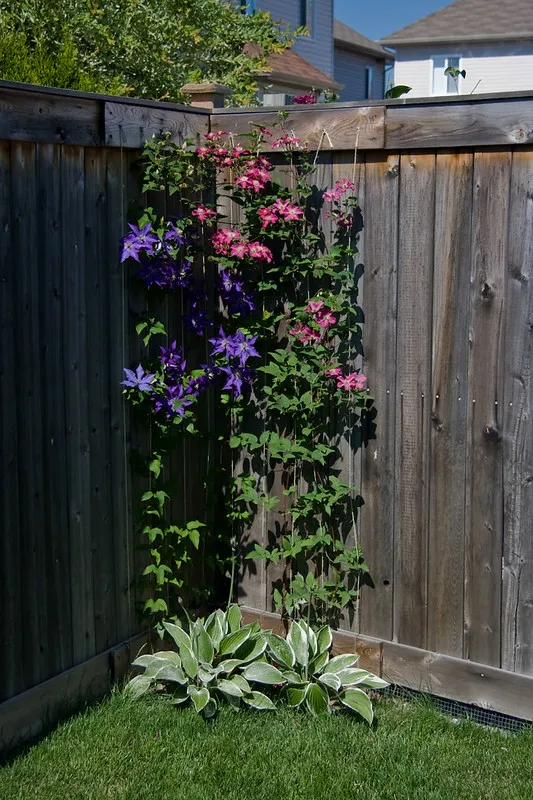
Fence Integration
If you have a timber fence in your garden, you may already have a perfectly serviceable clematis support — you just need to give the plant somewhere thin to grip. Solid timber fence panels (the kind made from overlapping boards) don’t offer enough grip points on their own, but add a few horizontal wires, a length of wire mesh, or even just a run of garden netting, and suddenly you have a full climbing surface.
Plastic-coated wire mesh — the kind sold for garden use in green or black — can be stretched across a fence panel and stapled in place. It’s inexpensive, lasts a long time, and becomes almost invisible once the clematis fills in. For a cleaner look, tensioned wire at 12-inch horizontal intervals, fixed with vine eyes screwed into the fence posts, achieves the same effect with much less visual weight.
A fence-grown clematis that covers an expanse of 6–10 feet is a remarkable thing — especially one of the later-flowering Group 3 varieties that produces masses of smaller flowers in late summer when most other climbers are done. The hard annual prune that Group 3 plants need each spring is also much easier to manage on a flat fence than on an obelisk or through a shrub.
Best For
Boundary fences, garden dividers, screening. Particularly effective with vigorous cultivars like ‘Jackmanii’ or ‘Comtesse de Bouchaud’ that naturally want to spread horizontally as well as vertically.
Read More: 5 Beautiful Boxwood Shrubs Landscaping Ideas
Trellis Ideas by Clematis Pruning Group
Your clematis’s pruning group should genuinely influence your trellis choice — because how dramatically you cut the plant back each year determines which structures are practical to maintain.
| Pruning Group | Pruning Style | Best Trellis Types | Avoid |
|---|---|---|---|
| Group 1 (e.g., montana, armandii) | Light tidy after flowering | Large pergolas, trees, big wall systems | Small obelisks — they’ll be overwhelmed |
| Group 2 (e.g., Nelly Moser, The President) | Light prune, remove dead wood | Obelisks, wall trellises, arches | Structures where cleaning out old stems is difficult |
| Group 3 (e.g., Jackmanii, viticella types) | Hard prune to ~12 inches each spring | Any structure — the prune resets everything | Nothing specific — most versatile group |
Group 3 clematis are genuinely the most trellis-friendly because the annual hard prune wipes the slate clean each year. You can grow them through shrubs, over fences, up cane structures, across pergolas — and each spring you cut them back and start fresh. Group 1 plants, on the other hand, accumulate years of growth and need large, robust structures that won’t be overwhelmed. Keep this in mind especially if you’re choosing between a compact obelisk and a larger wall system.
Trellis Materials at a Glance
| Material | Lifespan | Maintenance | Best Use | Approximate Cost |
|---|---|---|---|---|
| Cedar/Redwood wood | 10–15 years | Occasional oiling or staining | Panels, obelisks, arches | Medium–High |
| Painted softwood | 5–8 years | Repainting every few years | Panels, obelisks | Low–Medium |
| Stainless steel wire | 20+ years | Very low | Wall systems, fence wires | Low (materials) + installation time |
| Powder-coated steel | 15–20 years | Low (watch for rust if coating chips) | Obelisks, arches, pergola frames | Medium–High |
| Wrought iron | Decades with care | Annual rust inspection and touch-up | Formal obelisks, arches | High |
| Bamboo canes | 2–3 seasons | Replace as needed | Temporary supports, containers | Very Low |
| Wire mesh (plastic-coated) | 5–10 years | Low | Fence integration | Very Low |
Read More: 10 Low-Maintenance Plants Perfect for Side Yard Landscaping
A Few Things I’ve Learned the Hard Way
Don’t underestimate the weight. A mature clematis — particularly a vigorous Group 1 species — is considerably heavier than it looks when it’s leafed out and covered in flowers. Make sure your trellis is anchored properly, especially freestanding structures. I once had a beautiful cedar obelisk topple in a summer thunderstorm with a full-grown ‘Bill MacKenzie’ on it. The plant survived; the obelisk didn’t.
Clematis wilt is not a trellis problem, but it will look like one. If your plant collapses suddenly mid-season, the trellis is fine — it’s almost certainly clematis wilt, a fungal disease that affects young stems. Cut the affected stems back to healthy tissue (or to the ground if needed), keep the area tidy, and the plant usually re-shoots from the base. Don’t blame the support structure.
Early guidance pays off. In the first season, loosely tie young stems toward your chosen support structure every few weeks. Once the plant gets the idea, it will self-cling reliably — but that initial direction makes a real difference in getting even coverage rather than a tangled mess at one point and bare structure everywhere else.
Leave some stems untied. This sounds counterintuitive, but allowing some stems to move freely lets them find natural anchor points and creates a more relaxed, naturalistic effect than a perfectly trained plant. It also improves air circulation around the foliage.
Final Thoughts
There’s no single “best” clematis trellis — it really does depend on the plant you’ve chosen, the space you’re working with, and the look you’re after. But if I had to give one piece of universally applicable advice, it’s this: don’t overthink the structure itself, but do make sure whatever you choose has thin surfaces where the petioles can grip. Get that right, and the clematis will do the rest.
Whether you go with a polished cedar obelisk, a length of stainless wire across a brick wall, a handmade bamboo tripod, or just a robust old shrub that needs some company — clematis will reward your effort generously. It’s one of the most satisfying climbers in the garden for exactly this reason: it takes what you give it and makes it beautiful.