Last Updated on 3 years ago by Priyanka Handique
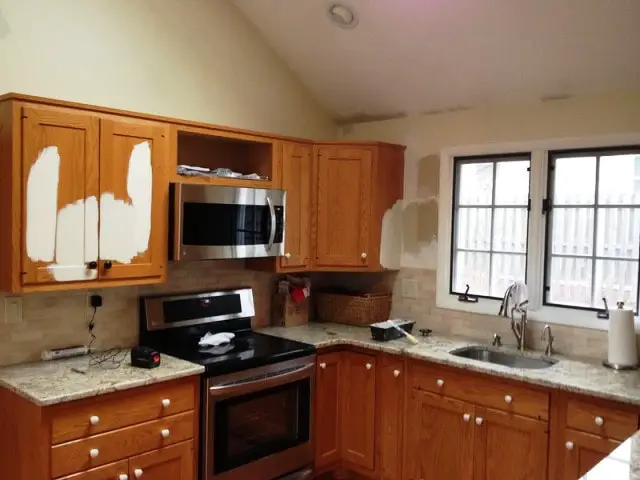
The kitchen cabinets start to fade after a few years, and updating these cabinets is a great way to give a modern look to your kitchen. If the cabinets have been poorly damaged, a light sanding is necessary so the paint will properly adhere to the wood. But If your cabinets are in good condition and feel smooth while touching, you can skip sanding.
Painting cabinets without sanding will refresh and improve the look of your kitchen. It will not only be a great DIY project but also will save you money.
The article discusses how to paint cabinets without sanding. So, keep reading this article to know the procedures you must follow to paint the cabinets in your dwelling by skipping sanding.
MORE POSTS: Backyard Covered Outdoor Kitchen Ideas for Cooking and Dining
How To Paint Cabinets Without Sanding?
Your kitchen cabinets look dull, and do you want to do a quick makeover? You may feel nervous about painting the cabinets at home. But you can easily do it at home, and it will look professional but also durable and eye-catching.
We have discussed below the methods you can follow and easily paint your cabinets without sanding. So, let’s look at them below.
1. Remove Cabinet Doors
You must paint your cabinets, for which you must first empty the things inside the cabinet.
Removing the door should be your next step, for which you have to remove the screws of the hinges. Well, that you cannot do by your hand.
Take the help of a few tools like a screwdriver and open the drawers and doors. The drawers may sometimes don’t remove easily by the tools. Well, you don’t need to panic. You just have to lift the drawers and slide through the tracks.
Some homeowners can have drawers that are fixed, i.e., you cannot remove them outside separately and apply paint. In such cases, you must paint them while painting the frame.
2. Keep Screws And Handles In The Proper Place
Keep the screws safe if you plan to use them again. Additionally, keep the handles and pull of the cabinet in the proper place. If your kitchen cabinet doors are of various shapes, you must take a picture before removing them. It will be easier for you to reassemble after painting. You can refer to the picture and reassemble it accordingly.
3. Clean Your Cabinets

The cabinets may have accumulated dust, grease, and dirt. Painting with dust and dirt will not adhere properly. So your job is to clean the cabinets thoroughly and pay special attention to the grease spots on the cabinets.
The best way to clean the cabinets is by taking a degreaser and scrubbing all the doors, drawers, and frames to remove all the grease and dust. But if the grease is too sticky, you can spray vinegar and allow it to sit for 5 -10 minutes and then apply degreaser and scrubber.
But don’t scrub too harshly or in one place for a long time, as it will create stains on the wood, which will look ugly after painting.
You need to wipe the kitchen doors and drawers with a wet cloth and allow them to dry for almost one hour.
4. Apply De-Glosser
You must take the cabinets, including doors and drawers, to a well-ventilated space when they are dry. Not pour a few drops of liquid de-glosser on a scouring pad and apply gently all over the cabinets by the following grain. But don’t forget to wear gloves while applying de glosser.
Remember touching de-glosser directly in your hand is not good, as it will damage your skin. Additionally, don’t apply de glosser in frames or indoors as it causes fumes which is not good for your health.
Applying a de-glosser is essential as it stops the need for sanding the wood surfaces and brings a shine to the cabinet.
5. Apply Primer On Cabinets

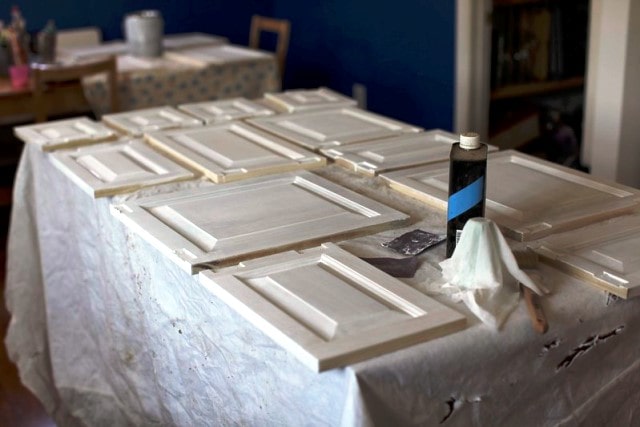
Allow the de glosser to dry for at least one hour, and then you need to apply paint over the cabinets. Take a brush and apply primer all over the doors and drawers. You can use a roller to paint a larger area of the doors and drawers.
But remember, if you don’t apply the primer within 60 minutes after the application of the de-glosser, then the paint may crack. If the paint you purchased has primer, you can skip the process.
6. Apply Primer For The Second Time
You need to wait a few hours so the first primer layer will dry off completely. You can then turn the drawers and then apply the second primer layer. You must wait 24 hours and use the paint on the kitchen cabinets.
7. Apply Enamel Paint Over The Cabinet
Take a paint pan and pour some enamel paint over it. You have to glide the roller over it and then apply it to the cabinets. You can use a paintbrush to avoid bubbles once you cover most surfaces with enamel paint. Allow the paint to dry for a few hours, and then apply the paint on the front part of the cabinet.
Always apply enamel paint in cabinets because they are mainly designed for this purpose and will also last for longer years.
There is no need to paint on the drawers because so many items will be inside them. You can consider painting on the outer layer to visualize it while opening.
8. Paint Over Cabinets Frame

Now you must apply paint over the cabinet frame, for which you must start from the back, and then you can apply paint over the sides and on the bottom surface.
9. Apply Paint On The Front Of The Cabinets
Use a roller and then roll the paint on all the flat surfaces of the cabinets. You can apply a paintbrush all over the body to avoid bubbles.
Once you apply the paint, keep the cabinets in a well-ventilated space, so they dry thoroughly.
10. Apply Second Coat
Applying the second coat can brighten the color of the cabinets. Apply the paint on the drawers and shelves and allow it to dry for 24 hours.
If the cabinets are dark and you paint a light color, apply more than two coatings for the best results.
11. Reattach The Cabinets
Now, wait for the paint to dry for almost 24-48 hours to adhere to the cabinet and dry entirely. Once the 48 hours are over, you need to reattach the cabinets in their proper place.
Refer to the diagram or picture and reattach them in their original position. If the hinges are dirty or greasy, you need to wash them thoroughly in soap and water to eliminate all the grease and then attach them in place.
Some homeowners may plan to purchase new hinges. We recommend measuring the old hinges and purchasing new hinges of almost the same shape and size so that you will not face any issues while reattaching.
Don’t tighten the hinges too much, as it can crack the paint while reattaching the cabinets.
12. Test Drawers And Doors
Reattach all the cabinets and test them by pulling and drawing to ensure they are correctly attached and slide through the frame smoothly.
Best Paint For Cabinets
You should always use a good primer so that the paint will stick to the wood cabinets properly.
Sometimes stains are created unknowingly on the wood cabinets, which look ugly and give a bad look to your kitchen. But fortunately, you can cover the old stains by choosing a good primer.
Additionally, ensure that the primer is mainly made for applying kitchen cabinets. Some people use a primer made for walls, which can give bad results to the cabinets.
Choosing a qualitative paint can give you excellent results. If you are doing a makeover of kitchen cabinets, then always choose a hard paint that can tackle moisture, grease, dust, and dirt. Choose a paint with a titanium oxide base instead of a calcium carbonate base for good results.
But if you want to repaint the bathroom cabinets, choose a paint that can endure moisture and mildew for excellent results.
Simultaneously paintbrushes and rollers play an important role in painting kitchen and bathroom cabinets. You should choose 2.5 inches angle brush and a 4-6 inches roller.
Conclusion
We have discussed above the methods you can follow to repaint your kitchen or bathroom cabinets at home easily. It will take almost two days, and you can complete the project according to your desires and give a new look to your dwelling.
Thank you for reading this article, and if you have any queries, feel free to ask in the comment section. We will be glad to answer your queries.
You can even post pictures after repainting the kitchen or bathroom cabinets and post them in the comment section.
MORE POSTS: Best RV Room Addition Ideas


