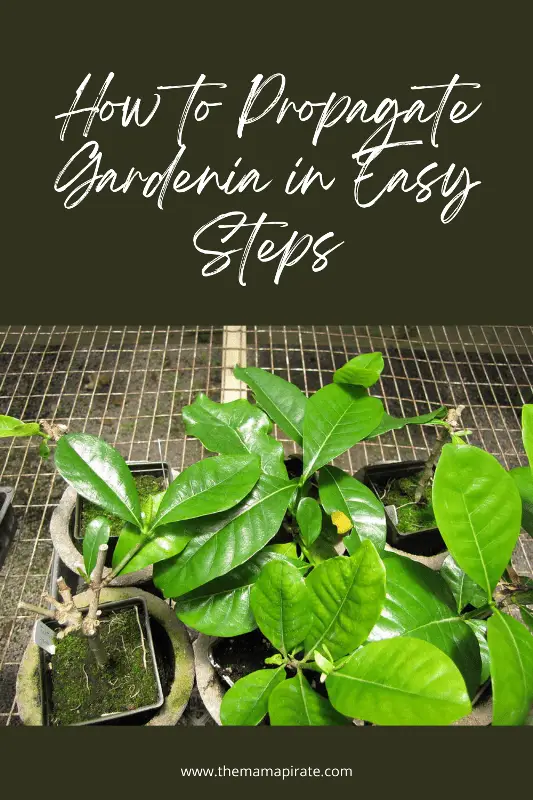
The gardenia, also known as Gardenia Jasminoides, is a white flower that boasts fragrance. It is grown handily in the US department of agriculture, zones 8 to 10. What makes these flowers special is they can be rooted in water from a simple cutting. To get the best stems for gardenia propagation, you need to follow tips to grow a healthy plant. You can ask for a cutting from your friend or neighbour and begin rooting it in your own house. After the roots preparation and setting up of the home station, you will have your small plant ready to pot.
In this article, we will help you learn how to propagate gardenia in easy steps. We will also cover some other sub-topics like propagating gardenia without rooting hormone, propagating gardenia in water, and much more. Do read with us till the end.
MORE POSTS: How do you propagate a ZZ plant from the leaf in water?
How to propagate gardenia without rooting hormone
The shrub grows actively in the early summer. So we advise you to take cuttings from your gardenia during that time of the season. Gardenia flowers grown in a well-hydrated environment with ample nutrients in the soil provide the highest quality stem cuttings. This takes a time of around 1 to 2 months to produce a new root system. The best time for transplantation is in the spring of the following year. Here are the steps of propagating gardenia without rooting hormone:
- Selection of gardenia stems
Look at the gardenia shrub and select those items that are free of damage from disease and insects. A flexible green stem with at least two healthy leaves is considered healthy. Select such a stem. Use pruning shears to serve the stem 6 inches back from the tip. Remove the leaves present at the cutting base. Do not cut the two leaves present closest to the tip in place.
2. Choose an ideal location.
Gardenias need a space that receives full to partial sunlight. They need the proper warmth of the sun for growth. Let your gardenia get correct sunlight in the morning rather than direct afternoon sunlight. Place the pot containing the gardenia flower near a south-facing window. This way, it will get proper sunlight throughout the day. You must also choose good soil for these shrubs. Soil with acidic pH levels of 5 to 6 is best for gardenias. You can also get the soil tested and then add the nutrients deprived. You will have to add sulphur if the soil is basic.
3. Prepare the cutting of gardenia.
The next step is to prepare the cutting of gardenia. Cut two 1-inch long slices up to the length of the cutting near the base on opposite sides. Always use sterilized cutting tools. It will prevent the spread of diseases. Use simple household cleaners like Lysol, isopropyl alcohol, or ethanol to disinfect your tools. Other cleaners that work well are bleach and trisodium phosphates, but they might be corrosive to your tools.
4. Plant the cutting of the stem
Mix the coarse sand, peat moss, and perlite in equal parts and pour it into the plant pot. Fill the pot up to 1 inch of its rim. In the middle of the plant pot, make a massive hole in the soil to hold half of the stem cutting. Insert the lower half of the stem into this hole and then fill it with soil.
5. Water the stem cutting
Lightly water the cutting of the stem until it is moist. You can use a spray bottle to mist the leaves of the cutting. To reduce the leaf’s water loss, put a plastic bag over the stem cutting.
6. Gardenia care and tips
You should keep the plant indoors at a temperature between 70 and 80 degrees Fahrenheit. Move the stem cutting to a place inside the house that receives indirect sunlight during the daytime. Water the cutting as and when required to keep the soil moist. To keep your gardenia from dehydrating, remove the plastic bag and mist the leaves daily with water. You can grow the cuttings outdoors in a shady location in warm climates. Do not use plastic to keep the plant hydrated if you live in humid weather. Do not tie the bag tightly if you use it on plants kept outdoors. Instead, keep the bag loose and its top open.
7. Watering needs of the plant
Watering is an inescapable part of how to propagate gardenia guide. In the initial days of establishment, water the plant every few days. Never get the leaves wet because they are more likely to have fungal growth. When the climate is dry, water the plant more; Gardenia is a shrub that needs less water during the blooming season. Give the plants distilled water at room temperature rather than cold water.
Before you water the gardenia, check its topsoil. Hold off watering if it is still damp. Many experts suggest keeping the gardenia plant on a tray filled with water. Pour water on the pebbles, which will provide moisture and humidity to the plant.
Fertilize your gardenia every three weeks. Use an acid-based fertilizer because these shrubs need acidic soil to grow. Once you have established the plants, fertilize them in end-March and October. Choose fertilizers like 6-6-6, 20-20-20, or 16-4-8. Water-soluble fertilizers are easy-to-use with the gardenias.
8. Check the growth of new roots.
Check the plant periodically, almost four to eight weeks after planting it for new roots. Remove the plastic bags from the stem and place the plant pot in an area that gets partial to full sunlight during the daytime. Gently pull the stem upwards. The plant has successfully grown new roots if it resists getting pulled out of the ground.
9. Prune your gardenia Pruning the plant must go hand-in-hand with propagating. You can use the leftover pruning cuttings to get new gardenia shrubs. The right time to prune your gardenia is when it is not producing blooms. Never cut all the leaves of the plant. After doing the pruning, you must also deadhead the plant. It means removing the damaged flowers and helping the plant to
bloom more. During the entire process, you will need some gardening tools. The list of things required are:
- Penknife
- Pruning shears
- Coarse sand
- Plastic bags
- Perlite
- Plant pot
- Peat moss
- Spray bottle
- Water
A newly growly gardenia plant can draw water only from the soil close to the base of the stem. It continues till the time your gardenia has grown an extensive root system. Water the soil immediately around the stem base for three to four months after plantation. It will make sure that the cutting absorbs the required amount of water. Maintain the soil pH between 5 and 6.5. For this, use fresh peat moss or add some sulphur to the potting mix. It is how to propagate gardenia without rooting hormones.
MORE POSTS: How to cut leaves off monstera and propagate them
How to propagate gardenia in water
There is a fact about gardenia plants, which is they can be rooted in water from a simple cutting. Let us look at the simple steps to do so.
- Take a proper cutting of the plant.
You can plant gardenia shrubs from fresh cuttings. Take these cuttings from a healthy plant showing no signs of weakness or disease. The cutting will also carry disease if the parent plant is unhealthy. It will make the new gardenia plant weak from the very start. Take the cutting from the tip of the branches. We still consider the branch to be softwood.
The cutting should have plenty of leaves, a length of more than 5 inches, and signs of healthy growth. Remove all the lower leaves once you choose the desired cutting. The branch should have only the top two leaves attached to it. You can also prepare the stem by trimming it in a horseshoe formation or cutting it into an angel. It will enable the branch to absorb a lot of water required for growth. You can also dip the branch tips in the rooting hormone so that the cutting flourishes and develops quickly.
2. Take care of the indoor growing conditions.
You have to give the right growing conditions to your gardenia so it becomes a healthy plant. Find a container that fits the roots of the shrub well. It can be as simple as locating a plastic or glass bottle tall enough to hold the stem so that it does not fall out when placed in it. Since the neck of a bottle is narrow, it is a good choice of container to grow plants. It will hold the roots more safely. Fill room temperature water in the bottle until there is only an inch below the rim. Use a paper towel to wrap the cutting and slowly lower the stem in the chosen container. Let the paper towel remain on the neck of the towel. It will act as a stopper allowing the cutting to
lower with a maximum of 2 inches of the stem submerged in water. Place the container with the plant near the window that receives lots of morning light and afternoon shade. Direct sunlight or too much light may burn the cutting, causing it to die.
3. Monitor the cutting
Monitoring is a vital step in the how-to propagate gardenia guide. The cutting of the shrub will begin signs of root growth in about a month from propagation. Regularly monitor the cutting to ensure that the water level is not too low and that the plant does not get too much direct sunlight. Gardenia shrubs also grow well in humid conditions. Give regular misting sessions so that the shrub grows rapidly.
If regular misting sessions are not possible, create a greenhouse effect by placing a large ziplock bag over the cutting. The bag should rest on the flat surface of the bottle, not on the plant. A cutout soda bottle will produce the same effect with a more rigid exterior than a simple plastic bag.
You will get signs of strong roots after one month of propagation. After this, move the water-rooted plant to a small pot filled with potting mix. You have to water the plant after moving it to the new medium so that the soil stays moist. Remember that the soil should remain moist and not wet. Upgrade the pot of the plant after a few months of considerable growth. You can also plant it outdoors if the weather permits.
MORE POSTS: How to propagate dracaena draco
How long does it take for gardenia cuttings to root?
You have to begin the propagating process of gardenia by getting the gardenia cuttings. The cuttings should be at least 12.5cm or 5 inches in length. Take them from the tip of the branch. Cuttings ideally will be soft and greenwood. The next step is to remove the lower leaves of the branch. Leave only the top two sets of leaves and take off all the other leaves.
Then, prepare a pot to root the gardenia cutting in it. The pot must contain equal parts of potting soil or peat and sand. Dampen the sand/peat mix to create a hole. Place the cutting of the gardenia shrub in the created hole. You can also dip the end of the stem in growth hormone for faster growth. After placing the cutting in the hole, backfill it with soil. Place the cutting in bright but indirect sunlight. Maintain a temperature of about 75F or 24C. The peat mixture should remain damp and not soaked.
A significant step in how to propagate gardenia successfully is to ensure that the shrub cuttings stay in high humidity until they root. You can do so in several ways. One such way is to cover the pot with a milk jug with the bottom part cut off. Another way is to cover the pot with a clear plastic bag. Whatever cover you use to increase the humidity, do not let it touch the gardenia cutting.
While using this propagation method, you can expect the gardenia cuttings to root in four to eight weeks. Propagation is a perfect way to use the leftover trimmings of gardenia from pruning.
End Verdict
It is the complete guide on how to propagate gardenia. Ensure to give your shrubs proper light, water, and soil conditions. Check your flowers for mealybugs and whiteflies. Other pests that can attack gardenia are spider mites, aphids, and thrips. You can use horticultural oil to get rid of pest problems. Over-watering and planting the shrubs too closely will lead to an unhealthy plant. Avoid doing both these things.
READ MORE POSTS:
How to Grow and Care for Indoor Dracaena trifasciata(Snake Plant)
How long does it take rose cuttings to root in water?
15 Best Hanging Plants for a Shaded Porch